User ManualTable of ContentsFRONT MATTER1CONTENTS3ABOUT THIS MANUAL6CHAP 1-SETTING UP THE PRINTER8Unpacking the Printer9Checking the parts9Choosing a Place for the Printer11Assembling the Printer14Installing the platen knob14Installing the ribbon cartridge15Attaching the paper guide20Testing the Printer22Plugging in the printer22Running the self test24Printing problems and solutions31Connecting the Printer to Your Computer33The parallel interface33Setting Up Your Application Software36Choosing from a menu36CHAP 2-PAPER HANDLING38Using Single Sheets39Loading paper39Reloading during printing43Using Continuous Paper44Positioning your continuous paper supply44Loading continuous paper45Switching Between Continuous and Single Sheets52Switching to single sheets52Switching back to continuous paper56Printing on Special Paper59The paper thickness lever59Multi-part forms62Labels63Envelopes64CHAP 3-USING THE PRINTER66Operating the Control Panel67Lights67Buttons68SelecType69Other control panel features70Setting the DIP Switches71Changing a DIP switch setting71The DIP switch tables72The DIP switch functions73Page Length74Skip Over Perforation75Adjusting the Loading Position77Using micro-adjustment78Using Short Tear-Off80Adjusting the tear-off position82Selecting Typestyles84Character fonts85Condensed mode87Selecting an International Character Set88Choosing a Character Table90Data Dump Mode92CHAP 4-SOFTWARE AND GRAPHICS95Enhancing Your Printing96Print quality and fonts96Character spacing97Character size98Special effects and emphasis99Selecting typestyles with Master Select101Graphics103The print head104The graphics commands106Column reservation numbers107Printing simple patterns108Printing taller patterns109Designing your own graphics110Individual graphics commands114The reassignment command114User-defined Characters115Designing your characters115Sending information to your printer117Printing user-defined characters118Copying ROM characters to RAM119Mixing print styles120Defining NLQ characters121CHAP 5-USING THE PRINTER OPTIONS125Cut Sheet Feeder126Installing the cut sheet feeder126Testing the printer in the cut sheet feeder mode133Operating the cut sheet feeder136Single sheet insertion138Removing the cut sheet feeder140Pull Tractor142Installing the pull tractor142Paper handling144Removing the pull tractor150Roll Paper Holder154Installing the roll paper holder154Paper handling156Removing the roll paper holder159Interface Boards161Choosing an interface161Compatible interfaces161Installing the interface board162#8143 New Serial Interface board176CHAP 6-MAINTENANCE177Cleaning the Printer178Replacing the Ribbon180Transporting the Printer185CHAP 7-TROUBLESHOOTING187Problems and Solutions188Power supply188Printing188Paper handling188Options188CHAP 8 -TECHNICAL SPECIFICATION218Printer Specifications219Printing219Paper220Mechanical224Electrical224Environment225Interface Specifications226Pin assignments for the parallel interface226Interface timing228Printing enabled/disabled signals and control conditions229Option Specifications230Single-bin cut sheet feeder (optional)230Initialization232Default settings232CHAP 9-COMMAND SUMMARY234Using the Command Summary235Control key chart237Commands in Numerical Order238Commands Arranged by Topic241Printer Operation241Data control245Vertical motion246Horizontal motion252Overall printing style255Print size and character width256Print enhancement259Word processing263Character tables264User-defined characters265Graphics267APPENDIX270Italic character table271Epson Extended Graphics character table272GLOSSARY274INDEX284QUICK REFERENCE290Control and ESCape Codes by Function291DIP Switch Settings294PRINTER DIAGRAM295Size: 3.2 MBPages: 296Language: EnglishOpen manual
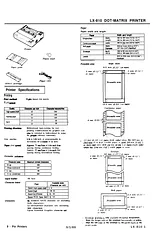
Product DatasheetTable of ContentsPRINTER SPECIFICATIONS1Printing1Paper1Mechanical2Electrical2Environment2MENU SELECTIONS2THE CONTROL PANEL2Lights2Buttons3SelecType3Other Control Panel Features3SETTING THE DIP SWITCHES3DEFAULTS4SELECTING TYPESTYLES4SELECTING CHARACTER SETS4PAPER HANDLING4Using Short Tear-Off4Using Micro-adjustment4THE CUT SHEET FEEDER5INTERFACES5Interface Timing6COMMANDS IN NUMERICAL ORDER6INSTALLING / SUPPORT TIPS7Software7DIP Switch Settings7Optional Serial Interface Operation7Cut-Sheet Feeder Operation7INFORMATION REFERENCE LIST8Related Documentation8Size: 301 KBPages: 8Language: EnglishOpen manual
User ManualTable of ContentsFRONT MATTER1CONTENTS3ABOUT THIS MANUAL6CHAP 1-SETTING UP THE PRINTER8Unpacking the Printer9Checking the parts9Choosing a Place for the Printer11Assembling the Printer14Installing the platen knob14Installing the ribbon cartridge15Attaching the paper guide20Testing the Printer22Plugging in the printer22Running the self test24Printing problems and solutions31Connecting the Printer to Your Computer33The parallel interface33Setting Up Your Application Software36Choosing from a menu36CHAP 2-PAPER HANDLING38Using Single Sheets39Loading paper39Reloading during printing43Using Continuous Paper44Positioning your continuous paper supply44Loading continuous paper45Switching Between Continuous and Single Sheets52Switching to single sheets52Switching back to continuous paper56Printing on Special Paper59The paper thickness lever59Multi-part forms62Labels63Envelopes64CHAP 3-USING THE PRINTER66Operating the Control Panel67Lights67Buttons68SelecType69Other control panel features70Setting the DIP Switches71Changing a DIP switch setting71The DIP switch tables72The DIP switch functions73Page Length74Skip Over Perforation75Adjusting the Loading Position77Using micro-adjustment78Using Short Tear-Off80Adjusting the tear-off position82Selecting Typestyles84Character fonts85Condensed mode87Selecting an International Character Set88Choosing a Character Table90Data Dump Mode92CHAP 4-SOFTWARE AND GRAPHICS95Enhancing Your Printing96Print quality and fonts96Character spacing97Character size98Special effects and emphasis99Selecting typestyles with Master Select101Graphics103The print head104The graphics commands106Column reservation numbers107Printing simple patterns108Printing taller patterns109Designing your own graphics110Individual graphics commands114The reassignment command114User-defined Characters115Designing your characters115Sending information to your printer117Printing user-defined characters118Copying ROM characters to RAM119Mixing print styles120Defining NLQ characters121CHAP 5-USING THE PRINTER OPTIONS125Cut Sheet Feeder126Installing the cut sheet feeder126Testing the printer in the cut sheet feeder mode133Operating the cut sheet feeder136Single sheet insertion138Removing the cut sheet feeder140Pull Tractor142Installing the pull tractor142Paper handling144Removing the pull tractor150Roll Paper Holder154Installing the roll paper holder154Paper handling156Removing the roll paper holder159Interface Boards161Choosing an interface161Compatible interfaces161Installing the interface board162#8143 New Serial Interface board176CHAP 6-MAINTENANCE177Cleaning the Printer178Replacing the Ribbon180Transporting the Printer185CHAP 7-TROUBLESHOOTING187Problems and Solutions188Power supply188Printing188Paper handling188Options188CHAP 8 -TECHNICAL SPECIFICATION218Printer Specifications219Printing219Paper220Mechanical224Electrical224Environment225Interface Specifications226Pin assignments for the parallel interface226Interface timing228Printing enabled/disabled signals and control conditions229Option Specifications230Single-bin cut sheet feeder (optional)230Initialization232Default settings232CHAP 9-COMMAND SUMMARY234Using the Command Summary235Control key chart237Commands in Numerical Order238Commands Arranged by Topic241Printer Operation241Data control245Vertical motion246Horizontal motion252Overall printing style255Print size and character width256Print enhancement259Word processing263Character tables264User-defined characters265Graphics267APPENDIX270Italic character table271Epson Extended Graphics character table272GLOSSARY274INDEX284QUICK REFERENCE290Control and ESCape Codes by Function291DIP Switch Settings294PRINTER DIAGRAM295Size: 3.2 MBPages: 296Language: EnglishOpen manual