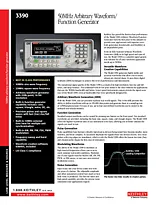
Data Sheet (3390)Table of ContentsIntroduction1General information1Contact information1Inspection1Options and accessories1Model summary1Features1Handle adjustment1Removing the handle1Adjusting the handle position1Connect and power the instrument1Line power connection1Ventilation1Figure 1-1 Moving the handle to an upright position1Figure 1-2 Removing the handle from the instrument1Figure 1-3 Default handle position for packing1Figure 1-4 Operation handle position1Figure 1-5 Carrying handle position1General information1Contact information1Inspection1Options and accessories1Model summary1Features1Handle adjustment1Removing the handle1Adjusting the handle position1Connect and power the instrument1Line power connection1Ventilation1Features1Handle1adjusting1adjustment1removing1Inspection1Ventilation1Power connection1Front Panel2Front panel description2Front panel2Power key2Graph/Local key2Menu operation soft keys2Display2Navigation wheel, cursor keys, and numeric keypad2Output connector2Sync output connector2Trigger key2Output key2Help menu key2Utility menu key2Store/Recall menu key2Modulation, Sweep, and Burst keys2Waveform selection keys2Figure 2-1 Model 3390 front panel2Figure 2-2 Graph mode2Figure 2-3 Default local mode2Table 2-1 Item descriptions2Front panel description2Front panel2Power key2Graph/Local key2Menu operation soft keys2Display2Navigation wheel, cursor keys, and numeric keypad2Output connector2Sync output connector2Trigger key2Output key2Help menu key2Utility menu key2Store/Recall menu key2Modulation, Sweep, and Burst keys2Waveform selection keys2Front panel2Graph/local key2Burst key2Help menu key2Burst2cursor2Graph/Local2Help menu2Menu operation2Display2Modulation2Output2power2Store/Recall menu2Sweep2Trigger2Utility menu2Waveform selection2Menu operation keys2Utility menu key2Modulation key2Output connector2Waveform selection keys2Output key2Power key2Store/Recall menu key2Sweep key2Sync output connector2Trigger key2Rear Panel3Rear panel description3Rear panel connections310 MHz Out and In connectors3Power connector3GPIB, USB, and LAN ports3Trig In/Out, FSK / Burst connector3Modulation In connector3Digital Output/low voltage transistor-transistor logic (LVTTL) port3Figure 3-1 Model 3390 rear panel3Table 3-1 Rear panel item descriptions3Rear panel description3Rear panel connections310 MHz Out and In connectors3Power connector3GPIB, USB, and LAN ports3Trig In/Out, FSK / Burst connector3Modulation In connector310 MHz connectors3Modulation In310MHz3FSK / Burst3Modulation In3Trig In/Out3Digital Output (LVTTL)3GPIB3LAN3USB3Rear panel3Setup Basics4Editing parameter values and settings4Numerical entry4Alphabetical entry4General functions and settings4Selecting output function4Setting frequency or period4Setting amplitude4Setting DC offset voltage4Setting pulse high and low levels4Setting waveform polarity4Setting output termination4Setting voltage auto ranging4Front panel connections4Controlling the output signal4Controlling the sync signal4Default settings4Restoring factory default settings4Figure 4-1 Setting instrument frequency4Figure 4-2 Setting instrument period4Figure 4-3 Setting instrument amplitude4Figure 4-4 Setting DC offset voltage4Figure 4-5 Setting waveform polarity4Figure 4-6 Setting voltage auto ranging to Auto4Figure 4-7 Setting voltage auto ranging to Hold4Figure 4-8 Setting the instrument to default4Figure 4-9 Accept default setting change4Table 4-1 Waveform function frequency ranges4Table 4-2 Sync signal and function relationships4Table 4-3 Factory default settings4Editing parameter values and settings4Numerical entry4Alphabetical entry4General functions and settings4Selecting output function4Setting frequency or period4Setting amplitude4Setting DC offset voltage4Setting pulse high and low levels4Setting waveform polarity4Setting output termination4Setting voltage auto ranging4Front panel connections4Controlling the output signal4Controlling the sync signal4Default settings4Restoring factory default settings4Frequency4Alphabetical entry4Amplitude4DC offset voltage4Default settings4restore4Alphabetical4Numerical4Voltage auto ranging4Numerical entry4Waveform polarity4Output functions4Output termination4Period4Pulse levels4Waveform Output Operations5Introduction5Output operations5Sine waveform5Square waveform5Ramp waveform5Noise waveform5Pulse waveform5Arbitrary waveform5Amplitude modulation5Frequency modulation5Phase modulation5Frequency-shift keying modulation5Pulse width modulation waveform5Frequency sweep5Burst operation5Pattern output operation5Figure 5-1 Setting the high-voltage level5Figure 5-2 Setting the low-voltage level5Figure 5-3 Setting up a sine waveform5Figure 5-4 Setting up a square waveform5Figure 5-5 Setting up a ramp waveform5Figure 5-6 Setting up a noise waveform5Figure 5-7 Setting up a pulse waveform5Figure 5-8 Press the soft key under Select Wform5Figure 5-9 Press the soft key under Built In5Figure 5-10 Press the soft key corresponding with the desired waveform5Figure 5-11 Press the soft keys corresponding with AM5Figure 5-12 Press the soft keys corresponding with FM5Figure 5-13 Press the soft keys corresponding with PM5Figure 5-14 Press the soft keys corresponding with FSK5Figure 5-15 Press the soft keys corresponding with PWM5Figure 5-16 Press the soft keys corresponding with frequency sweep5Figure 5-17 Press the soft keys corresponding with trigger setting5(internal triggering shown)5Figure 5-19 Press the soft keys corresponding with trigger slope5Figure 5-20 Press the soft keys corresponding with gated burst5Figure 5-21 Setting frequency or period for pattern output5Figure 5-22 Setting start address for pattern output5Figure 5-23 Setting end address for pattern output5Figure 5-24 Setting repeat on or off for pattern output5Figure 5-25 Selecting waveform for pattern output5Figure 5-26 Selecting slope for pattern output5Figure 5-27 Pattern generator cable5Figure 5-28 Socket pin out structure5Figure 5-29 Connector pin out structure5Table 5-1 Parameters for each burst mode5Introduction5Output operations5Sine waveform5Square waveform5Ramp waveform5Noise waveform5Pulse waveform5Arbitrary waveform5Amplitude modulation5Frequency modulation5Phase modulation5Frequency-shift keying modulation5Pulse width modulation waveform5Frequency sweep5Burst operation5Pattern output operation5Frequency modulation5Frequency sweep5Frequency-shift keying modulation5Amplitude modulation5Arbitrary waveform5Burst operation5amplitude5frequency5phase5Noise waveform5arbitrary5Output operations5noise5pulse5ramp5sine5Pattern output operation5square5Phase modulation5Pulse waveform5Pulse width modulation waveform5Ramp waveform5Sine waveform5Square waveform5System Operations6Introduction6Instrument system operations6Storing the instrument state6Controlling the display6Controlling the error beep6Controlling the system sound6Performing self-test6Figure 6-2 Enter the name for the selected memory location6Figure 6-3 Select the desired memory location for recall6Figure 6-4 Select the desired memory location for deletion6Introduction6Instrument system operations6Storing the instrument state6Controlling the display6Controlling the error beep6Controlling the system sound6Performing self-test6deleting6recalling6storing6controlling6Self-test6error beep6system6System operations6Remote Programming7Remote interface operation7KiWAVE™ software installation7USB interface7IEEE-488 (GPIB) interface7LAN interface7LXI™ function7Remote interface commands7Figure 7-1 LXI browser Web Control interface7Figure 7-2 LXI browser Web Control Help page7Remote interface operation7KiWAVE™ software installation7USB interface7IEEE-488 (GPIB) interface7LAN interface7LXI™ function7Remote interface commands7IEEE-4887LAN7USB7IEEE-488 interface7KiWAVE7LAN interface7LXI function7USB interface7Size: 2.39 MBPages: 120Language: EnglishOpen manual