ManualTable of ContentsContents3Chapter 1 Safety information5Safety information (all countries)6Chapter 2 Regulation notices11Regulation notices12Chapter 3 General information15General information16Chapter 4 Miscellaneous17Online support for your product18Size: 317 KBPages: 20Language: EnglishOpen manual
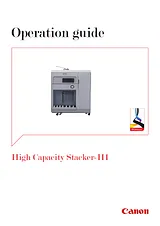
ManualTable of ContentsContents3Chapter 1 Preface5Disclaimers6Notes for the reader7Chapter 2 Parts and their function9Description of the main parts10Description of the stacker control panel12Chapter 3 Basic instructions15Turn the stacker on16Turn the stacker off17Eject a stack manually18Chapter 4 Use the stacker19Filling scenarios20Change the default stacker settings21Set the maximum stack height23Set the minimum filling level24Examples of using the [Maximum stack height] and the [Minimum filling level] settings25Chapter 5 Troubleshooting29Error location labels30Remove an error sheet from the internal error tray (A1)32Clear a paper jam in the input paper path (A2-A5)33Clear a paper jam in the input paper path of the registration unit (A6-A7)35Clear a paper jam in the paper path (B1)37Clear a paper jam in the horizontal paper path (B2-B5)39Clear a paper jam at the flip wheel (C1)41Chapter 6 Options43Use the EasyLift to unload the stacker44Appendix A Specifications47Specifications48Index49Size: 1.94 MBPages: 52Language: EnglishOpen manual
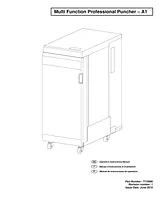
ManualTable of ContentsTABLE OF CONTENTS3/1. SAFETY INSTRUCTIONS3/ Important safeguards3Cleaning3/ Safety messages4MAIN CORDSET SELECTION4Service, Professional Puncher4DO NOT REMOVE THE MACHINE’S COVER.4Service, Diesets4/ Safety messages4FCC NOTE42. INTRODUCTION4Duty Cycle and Product Positioning4Operating Die Set Supplies43. QUICK START GUIDE51. Bypass Mode:52. Punch Mode:53. Crease Mode:5Layout of Professional Puncher LCD User Interface54. Die Set Configuration54. USER OPERATIONS6i. Interchanging Die Sets:6ii. Punch Chip Container:6iii. Die Set Storage:6iv. Punch Bypass:6v. Punch Mode Path:6Paper flow and User Interactive sections of Professional Puncher6B. Punch Chip Container:6C. Paper Clearing:75. USER DISPLAY7LCD Panel Overview7Messages on the LCD Panel71. Ready Bypass72. Ready To Punch73. Ready To Crease74. Running Bypass75. Running Punch76. Running Crease77. Chip tray Full78. Chip tray Out79. Check die710. Close Door711. Paper jam7Changing the Settings on the LCD panel81 Crease Mid8Displaying Information on the LCD Panel8Glossary10Pin Numbering10Figure 8.1 Coil Die Set Pin Numbering10Figure 8.2 Pressure Bar Removal10Figure 8.3 Pressure Bar10Figure 8.4 Pin Removal10Figure 8.5 Replace Pressure Bar10Pin Addition11Figure 8.6 Pin Addition11Die Stop Position11Figure 8.7 Coil Die Stop Position11Die Set Maintenance11To lubricate die set pins that do not have felt pads:11To lubricate die set pins that have felt pads:11Figure 8.8 Lubrication11End of Die Life11Die Set Handling11Professional Puncher Die Sets12Size: 1 MBPages: 12Language: EnglishOpen manual
ManualTable of ContentsContents3Chapter 1 Safety information5Safety information (all countries)6Chapter 2 Regulation notices11Regulation notices12Chapter 3 General information17General information18Chapter 4 Miscellaneous19Online support for your product20Size: 922 KBPages: 22Language: EnglishOpen manual