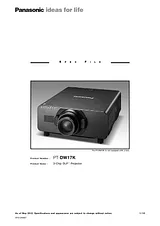
Справочник ПользователяСодержаниеFront cover1Specifications2Specifications - 23Specifications - 34Dimensions5Terminals5Standard setting-up position6Projection distance for 16:9 aspect ratio screen7Calculation of the projection distance8Shift range9Installable angle9List of compatible signals10List of compatible signals - 211Serial connector12Pin assignments and signal names12Communication conditions (factory setting)12Basic format12Cable specifications13Control commands13Status request commands14Command example15Notes on projector placement and operation15Direction of air intake and exhaust16Operating the projector continuously16Размер: 2,2 МБСтраницы: 16Язык: EnglishПросмотреть
Справочник ПользователяСодержаниеImportant Information2Read this first!2Precautions for use15Cautions when transporting15Cautions when installing15Security18Disposal18Cautions on use18Accessories19Optional accessories20Preparation21Start-up display21About your projector22Remote control22Projector body24Using the remote control27Inserting and removing the batteries27Setting Remote control ID numbers27Connecting to the projector with a cable27Getting Started28Setting up28Projection method28Parts for ceiling mount (optional)28Screen size and throw distance29Adjusting adjustable feet42Attaching/removing the projection lens (optional accessory)43Attaching the projection lens43Removing the projection lens43Connecting44Before connecting44Connecting example: AV equipment45Connecting example: Computers47Basic Operation48Switching on/off the projector48Connecting the power cord48Power indicator49Switching on the projector50Making adjustments and selections50Switching off the projector51Projecting52Select the input signal52Adjusting the focus, zoom, and shift52Moving the lens to the home position53Adjustment range by the lens position shift (optical shift)54Adjusting the lens mounter when the focus is unbalanced55Remote control operation58Using the shutter function58Using the on-screen display function58Switching the input58Using the STATUS function59Using the Automatic setup function59Using the Function button59Displaying the internal test pattern60Changing the picture aspect ratio60Settings61Menu navigation61Navigating through the menu61Main menu62Sub-menu63[PICTURE] menu65[PICTURE MODE]65[CONTRAST]66[BRIGHTNESS]66[COLOR]66[TINT]66[COLOR TEMPERATURE]66[GAMMA]68[SYSTEM DAYLIGHT VIEW]68[SHARPNESS]68[NOISE REDUCTION]69[DYNAMIC IRIS]69[SYSTEM SELECTOR]70Making sRGB compliant images71[POSITION] menu72[SHIFT]72[ASPECT]72[ZOOM]73[CLOCK PHASE]74[GEOMETRY] (PT‑DZ21KE and PT‑DS20KE only)74[KEYSTONE] (PT-DW17KE only)76[ADVANCED MENU]77[DIGITAL CINEMA REALITY]77[BLANKING]77[INPUT RESOLUTION]78[CLAMP POSITION]78[EDGE BLENDING]78[FRAME RESPONSE]80[FRAME LOCK] (PT‑DZ21KE and PT‑DS20KE only)80[RASTER POSITION]80[DISPLAY LANGUAGE] menu81Changing the display language81[3D SETTINGS] menu (PT‑DZ21KE and PT‑DS20KE only)82[3D SYSTEM SETTING]82[3D SYNC SETTING]82[3D SIMUL INPUT SETTING]83[3D INPUT FORMAT]84[LEFT/RIGHT SWAP]84[3D COLOR MATCHING]84[3D PICTURE BALANCE]85[DARK TIME SETTING]85[3D FRAME DELAY]86[3D TEST MODE]86[3D TEST PATTERN]86[SAFETY PRECAUTIONS MESSAGE]87[3D SAFETY PRECAUTIONS]87[DISPLAY OPTION] menu88[COLOR MATCHING]88[LARGE SCREEN CORRECTION]89[SCREEN SETTING] (PT‑DZ21KE and PT‑DS20KE only)90[AUTO SIGNAL]90[AUTO SETUP]91[RGB IN] (supported during RGB signal input only)92[DVI-D IN]92[HDMI IN]93[SDI IN] (PT‑DZ21KE and PT‑DS20KE only)93[ON-SCREEN DISPLAY]94[BACK COLOR]95[STARTUP LOGO]95[UNIFORMITY]95[SHUTTER SETTING]96[FREEZE]96[WAVEFORM MONITOR]96[CUT OFF]98[PROJECTOR SETUP] menu99[PROJECTOR ID]99[PROJECTION METHOD]99[COOLING CONDITION]100[HIGH ALTITUDE MODE]100[LAMP SELECT]100[LAMP RELAY]101[BRIGHTNESS CONTROL]102[STANDBY MODE]106[SCHEDULE]106[RS-232C]108[STATUS]109[NO SIGNAL SHUT-OFF]110[REMOTE2 MODE]110[FUNCTION BUTTON]110[DATE AND TIME]110[LENS CALIBRATION]111[LENS MEMORY]112[SAVE ALL USER DATA]113[LOAD ALL USER DATA]113[INITIALIZE]114[SERVICE PASSWORD]114[P IN P] menu115Using P IN P functions115Setting P IN P functions115[TEST PATTERN] menu117[TEST PATTERN]117[SIGNAL LIST] menu118Registering a signal to the list118Renaming the registered data118Deleting the registered data118Protecting the registered data119Expanding signal lock-in range119Managing the sub memory list120[SECURITY] menu121[SECURITY PASSWORD]121[SECURITY PASSWORD CHANGE]121[DISPLAY SETTING]122[TEXT CHANGE]122[CONTROL DEVICE SETUP]122[CONTROL DEVICE PASSWORD CHANGE]124[NETWORK] menu125[NETWORK SETUP]125[NETWORK CONTROL]125[NETWORK STATUS]125Network connections126Accessing from the Web browser127Maintenance142Lamp/Temperature/Filter Indicators142Managing the indicated problems142Maintenance/replacement144Before maintaining/replacing the unit144Maintenance144Replacing the unit146Troubleshooting151Self-diagnosis display153Appendix156Technical information156PJLink protocol156Control commands via LAN157<SERIAL IN>/<SERIAL OUT> terminal160<REMOTE 2 IN> terminal164Two window display combination list165Control device password166Upgrade kit (only supports PT‑DZ21KE and PT‑DS20KE)166List of compatible signals167Specifications172Dimensions175Ceiling mount bracket safeguards176Index177Размер: 17,1 МБСтраницы: 179Язык: EnglishПросмотреть