User ManualTable of ContentsAdjusting the position40safety5Accessories9Before use10Audio adjustment44part12Inserting the wireless card17Option settings45Setting-up18Connections20control unit22Network setup48SD card setup48Turning on the power23function49Turning off the power25and automatic positioning27momentarily28Pausing a picture28Enlarging the picture29Adjusting the volume29the air filter54Replacing the lamp unit55control unit30Before calling for service58Cleaning and maintenance59On-screen menus32Specifications60Appendix62Adjusting the picture37Dimensions66Size: 2.24 MBPages: 34Language: EnglishOpen manual
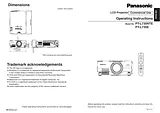
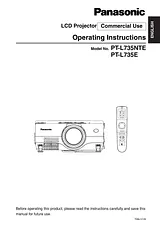
Operating GuideTable of ContentsPreparation2IMPORTANT SAFETY NOTICE2Precautions with regard to safety5Accessories9Before use10Location and function of each part12Inserting the wireless card17Getting started18Setting-up18Projection methods18Projector position19Projection distances19Connections20Example of connecting to video equipments20Example of connecting to computer21Preparation for the remote control unit22Basic Operation23Turning on the power23Turning off the power25Useful functions27Correcting keystone distortion and automatic positioning27Turning off the picture and sound momentarily28Pausing a picture28Enlarging the picture29Adjusting the volume29Useful functions of the remote control unit30Laser beam pointer30Wireless mouse31Adjustments and settings32On-screen menus32Menu screens32Menu operation guide35Returning a setting to the factory default36Adjusting the picture37PICTURE MODE37CONTRAST38BRIGHT38COLOR38TINT38SHARPNESS38Colour Hue Setting38Noise Reduction (NR)38WHITE BALANCE R/G/B38TV-SYSTEM38Projecting sRGBcompatible39Adjusting the position40POSITION40DOT CLOCK41CLOCK PHASE41KEYSTONE41OSD POSITION42ASPECT42RESIZING43AUTO SETUP43FRAME LOCK43Audio adjustment44VOLUME44MUTE44AUDIO MODE44Changing the display language44Option settings45OSD45AUTO SEARCH45AUTO SIGNAL45AUTO KEYSTONE45RGB2 SELECT45RGB/YPBPR46VGA60/525P46BLACKBOARD46BACK COLOR46FRONT/REAR46DESK/CEILING46FAN CONTROL46LAMP POWER46LAMP RUN TIME46FUNC 146CONTROL KEY47AUTO POWER OFF47Network setup48SD card setup48Setting up the SECURITY function49PASSWORD SETTING49CHANGE PASSWORD49TEXT DISPLAY50CHANGE TEXT50LOGO DISPLAY,CLEAR,CAPTURE51Care and maintenance52When the TEMP indicator and the LAMP indicator are illuminated52Cleaning and replacing the air filter54Replacing the lamp unit55Before calling for service58Cleaning and maintenance59Others60Specifications60Appendix62List of compatible signals62Connector pin wiring63Projection dimensions calculation methods63Using the SERIAL connector64Dimensions66Trademark acknowledgements66Size: 1.85 MBPages: 66Language: EnglishOpen manual
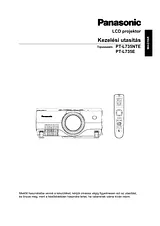
Operating GuideTable of ContentsVorbereitung2WICHTIGE HINWEISE ZUR SICHERHEIT2Hinweise fur die Sicherheit5Zubehor9Vor der Inbetriebnahme10Anordnung und Funktion der einzelnen Bedienungselemente12Einsetzen der Wireless Karte17Vor der Inbetriebnahme18Aufstellung18Projektionsarten18Projektorposition19Projektionsabstande19Anschlusse20Beispiel fur den Anschluss von Audiogeraten20Beispiel fur den Anschluss eines Computers21Vorbereitungen fur die Fernbedienung22Grundbedienung23Einschalten des Projektors23Ausschalten des Projektors25Sinnvolle Funktionen27Trapezkorrektur und automatische Positionierung27Kurzzeitiges Abschalten der Bildund Tonwiedergabe28Standbildwiedergabe28Vergrosern des Bildes29Einstellen der Lautstarke29Nutzliche Funktionen der Fernbedienung30Laserstrahlzeiger30Kabellose Maus31Einstellungen32Bildschirmmenus32Menubildschirme32Menubedienung35Zuruckstellen einer Einstellung auf den voreingestellten Wert36Bildeinstellungen37Bild37KONTRAST38HELLIGKEIT38FARBE38TINT38BILDSCHARFE38FARBTON38Storungsunterdruckung(NR)38Weisabgleich R/G/B38Fernsehnorm39Projektion von sRGBkompatiblenBildern39Einstellen der Position40POSITION40Zeilentakt41Taktphase41KORREKT41OSD POSITION42Seitenverhaltnis42Grose anpassen43AUTO MATIK43BILDSPERRE43Audioeinstellung44LAUTSTARKE44STUMM44AUDIO-MODUS44Andern der Anzeigesprache44Weitere Einstellungen45Bildschirmanzeige45AUTO SUCHE45AUTO SIGNAL45Automatische Trapezkorrektur45RGB2 AUSWAHL46RGB/YPBPR46VGA60/525P46TAFEL46HINTERGRUND46MONTAGE46TISCH/DECKE46KUHLGEBLASE46Lampenleistung46Lampenbetriebszeit46FUNKTION 147STRG-TASTE47AUTOMACHT VON47Netzwerkeinstellung48SD-Karte48Einstellen der Sicherheitsfunktion49KENNWORTEINST.49KENNWORTWECHSEL49TEXTANZEIGE50TEXTVERANDERUNG50AUSSTEL.GEFANGEN51GEFANGEN.LOSCHT51LOGO-KOPIERUNG51Pflege und Wartung52Bei leuchtender TEMP- und LAMPAnzeige52Reinigen und Ersetzen des Luftfilters54Austauschen der Lampe55Fehlersuche58Reinigung und Wartung59Sonstiges60Technische Daten60Anhang62Liste kompatibler Signale62Klemmenbelegung des Steckers63Berechnung der Projektionsabstande63Serielle Buchse64Abmessungen66Eingetragene Warenzeichen66Size: 1.86 MBPages: 66Language: DeutschOpen manual
Instruction ManualTable of ContentsENGLISH1Contents2Notes for use4Information on SD Memory Card4Instructions on handling4Instruction on storage4For protection of important data4To create a backup copy of the data stored on the SD card5Write protection switch5Information on wireless card6Available channels8Typical applications of network functions / SD Memory Card9Examples of use of network functions9SD Memory Card9Examples of use of network functions / SD Memory Card10Insertion and removal of wireless card and SD Memory Card into / from the projector11Wireless card11SD Memory Card12Installation of software14Wireless Manager 3.0 / Image Creator 1.0A14Wireless LAN Driver15Wireless Simple Connection (live mode)21Operations on the projector21Operations on the personal computer22Releasing the connection to the projector23Temporary releasing23Complete releasing23Network setting25Use of inter-PC communications25If the communication mode of 802.11 ad hoc (peer-to-peer) is selected:25Use of access point (AP)26Setting example26Setting up the projector27Settings on the personal computer30Settings of TCP/IP30Settings for use of optional wireless card (ET-CDWL2U)34Use of Wireless Manager 3.038Start-up38Live mode38Selecting the transfer mode38In live mode39Quitting and resuming live mode39Meeting mode (screen capture)39Selection of capture format40Operations after image acquisition40Setting of capture delay time40"PowerPoint --> Presentation" mode41Presentation mode41Setting of capture delay time41Presentation mode42Progress bar42Switching display mode42Other functions44Searching projector44Registering projector44Deleting projector44Confirming connection44Displaying the sender, sender's name45Setting a shortcut key45Setting automatic play45Setting Simple Connection45Use of Web browser control46Settings on the projector46Web control46Web power supply46Web password46Settings on the personal computer47Operation of Web browser control48Top screen48Projector control49Basic control screen49Option control screen49Monitor information screen50SD control51SD file list screen51SD thumbnail screen51Presentation screen52Changing password52Using a PDA53Starting the Web browser control (PDA)53Top screen53Menu screen54Projector Control54SD Control55Status55Use of Image Creator 1.0A56Starting/ending Image Creator 1.0A56Start-up56End56Functions on the main screen56Converting and saving captured images58Capturing presentation files created with Microsoft PowerPoint97/2000/200260Capturing JPEG, BMP, TIFF or PNG files created with other applications61Press the "Capture image" button61Images not to be captured61Capturing files by drag-and-drop operation61Sorting images62Deleting images62Make conversion settings when writing an image.63DCF standard65Directory (folder) name65File name65File format65How to use SD card66Playing images of SD Memory Card66SD Viewer (SD guide display)67Folder selection screen67File selection screen67Settings of automatic play (auto play)68Uninstallation of software70Wireless Manger 3.070Image Creator 1.0A70Wireless LAN Driver70Explanation of terms71Before placing a repair order74Trademark Information76Size: 3.68 MBPages: 76Language: EnglishOpen manual