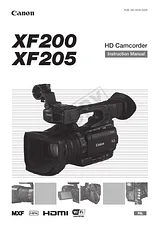
用户手册目录Important Usage Instructions2Highlights of the XF200 / XF2055Table of Contents71. Introduction11About this Manual11Conventions Used in this Manual11Supplied Accessories13Names of Parts14WL-D6000 Wireless Controller212. Preparations23Preparing the Power Supply23Using a Battery Pack23Using a Household Power Outlet25Turning the Camcorder On and Off26Date, Time and Language Settings27Setting the Date and Time27Changing the Time Zone27Displaying the Date and Time while Recording28Changing the Language28Using the Menus29Selecting an Option from the Menu29Using the Customized Submenu (My Menu)30Preparing the Camcorder32Attaching the Microphone Holder Unit32Attaching the Lens Hood32Using the Viewfinder32Using the OLED Panel33Adjusting the Viewfinder/OLED Screen34Adjusting the Color Balance of the OLED Screen34Setting the Screen to Black & White35Adjusting the Grip Unit35Attaching the Shoulder Strap36Removing and Attaching the Terminal Covers36Using a Tripod37Preparing Recording Media38Inserting a CF Card39Checking the Status of the CF Card Slots39Removing a CF card40Inserting and Removing an SD Card40Initializing the Recording Media41Switching Between the CF Card Slots41Selecting the CF Card Recording Method42Checking the Available Recording Time on a Recording Media43Recovering Data on a Recording Media43Remote Operation of the Camcorder44Using the Supplied Wireless Controller44Using the Optional RC-V100 Remote Controller453. Recording47Recording Video47Preparing to Record47Recording48Remote Operation Using Browser Remote50Onscreen Displays51Power Save Mode54Using the Fan54Video Configuration: Movie Format, Bit Rate, Resolution and Frame Rate55Changing Main Camera Functions with the Joystick57Using the Direct Setting Mode57Shutter Speed58Automatic Shutter59Manual Shutter60Flicker Reduction61Gain62Selecting the Gain Level62Automatic Gain Control (AGC)62Manual Gain63Aperture65Automatic Aperture65Manual Aperture66ND Filter67Exposure Compensation - AE Shift67Light Metering Mode68White Balance69Auto White Balance (AWB)70Preset White Balance/Color Temperature71Custom White Balance72Zooming74Selecting the Zoom Mode74Using the Zoom Ring75Using the Zoom Rockers on the Camcorder75Remote Operation78Soft Zoom Control79Using Optional Conversion Lenses80Adjusting the Focus81Autofocus (AF) Mode81Manual Focus (MF)83Push AF85Detecting and Focusing On Faces85Focus Limit and Macro Shooting86Image Stabilizer87Onscreen Markers and Zebra Patterns88Displaying Onscreen Markers88Displaying Zebra Patterns89Setting the Time Code90Selecting the Running Mode90Putting the Time Code Display on Hold91Setting the User Bit92<XF205> Synchronizing with an External Device93Connecting an External Device93Reference Video Signal Input (Genlock Synchronization)93Time Code Signal Input94Reference Video Signal Output95Time Code Signal Output95Recording Audio96Audio Settings and Recorded Audio Channels96Selecting the Number of Recorded Audio Channels98Connecting an External Microphone or External Audio Input Source to the Camcorder98Using the Built-in Microphone or MIC Terminal99Using the INPUT 1/INPUT 2 Terminals101Adjusting the Audio Level103Monitoring the Audio with Headphones104Colors Bars/Audio Reference Signal105Recording Color Bars105Recording an Audio Reference Signal105Video Scopes106Displaying a Video Scope106Configuring the Waveform Monitor106Configuring the Vectorscope107Configuring the Edge Monitor107Adding Marks to MXF Clips while Recording108Adding Shot Marks while Recording108Adding an OK Mark or Check Mark to the Last Clip Recorded108Using Metadata109Setting a User Memo Created with Canon XF Utility109Setting a User Memo Using Browser Remote110Recording GPS Information (Geotagging)112Reviewing a Recording114File Numbering115Special Recording Modes116Interval Recording Mode116Frame Recording Mode117Slow & Fast Motion Mode118Pre-recording Mode119Simultaneous Recording of MXF and MP4 Clips121Recording in MP4 Backup Recording Mode122Infrared Recording124Activating Infrared Mode124Using the Infrared Light124Using the Focal Length Guide1264. Customization127Assignable Buttons127Changing the Assigned Function127Using an Assignable Button128Custom Picture Settings130Selecting Custom Picture Files130Editing a Custom Picture File’s Settings131Renaming Custom Picture Files131Protecting Custom Picture Files131Transferring Custom Picture Files132Embedding Custom Picture Settings in a Recording133Available Custom Picture Settings133Customizing Functions and Onscreen Displays139Customizing Functions139Customizing Onscreen Displays140Saving and Loading Camera Settings141Saving Camera Settings to an SD Card141Loading Camera Settings from an SD Card1415. Playback143Playback143MXF and MP4 Clip Index Screens143Playing Back Clips145Onscreen Displays145Playback Controls146Adjusting the Volume147Clip Operations148Using the Clip Menu149Displaying Clip Information149Adding OK Marks or Check Marks150Deleting OK Marks or Check Marks151Copying Clips151Deleting Clips152Deleting the User Memo and GPS Information153Copying a Custom Picture File Embedded in a Clip153Displaying an Index Screen of Shot Marks153Displaying a Frame Index Screen of a Single Clip154Adding Shot Marks155Deleting Shot Marks155Changing a Clip’s Thumbnail1566. External Connections157Video Output Configuration157Recording Video Signal Configuration and Video Output Configuration by Terminal157Playback Video Configuration and Video Output Configuration by Terminal158Connecting to an External Monitor160Connection Diagram160<XF205> Using the 3G/HD-SDI Terminal161<XF205> Using the MON. Terminal161Using the HDMI OUT Terminal162Using the AV OUT Terminal162SD Output163Superimposing Onscreen Displays to Appear on an External Monitor163Audio Output164Selecting the Audio Channel164Synchronizing the Video with the Audio being Monitored165Selecting the Output Level of the AV OUT Terminal165Saving Clips to a Computer166Saving MXF Clips166Saving MP4 Clips168Connecting the Camcorder to a Computer1697. Network Functions171About the Network Functions171Connecting to a Wi-Fi Network172Wi-Fi Protected Setup (WPS)172Searching for Access Points173Manual Setup175Camera Access Point175Configuring the IP Address Settings176Saving the Configuration176Connecting to a Wired (Ethernet) Network177Selecting a Network Connection178Changing Network Settings179Browser Remote: Controlling the Camcorder from a Network Device180Setting Up Browser Remote180Starting Browser Remote181Real-Time Proxy Transfer186FTP File Transfer187Preparations187FTP Transfer in CAMERA Mode188FTP Transfer in MEDIA Mode189Playback via Browser1918. Photos193Taking Photos193Taking Photos in CAMERA Mode193Capturing Photos in MEDIA Mode193Photo Playback195Displaying the [Photos] Index Screen195Viewing Photos195Deleting Photos1969. Additional Information197Menu Options197Displaying the Status Screens207Troubleshooting216List of Messages221Handling Precautions226Maintenance/Others229Optional Accessories230Specifications233Index239文件大小: 20.2 MB页数: 242Language: English打开用户手册