사용자 가이드차례Trademarks2Statement of Conditions2Customer Support2Contents3Chapter 1 About This Guide5Audience5Why the Document was Created5How to Use This Document5Typographical Conventions6Special Message Formats6Chapter 2 Switch Management Overview7Management Access Overview7Chapter 3 Getting Started10For a Network with a DHCP Server10For a Network without a DHCP Server12Chapter 4 Web-Based Management Interface15System Menu16System> Switch Status Page16System> IP Access List Page17System> Set-up Page17System> Password Page18Switch Menu18Switch> Port Configuration Page18Switch> Port Configuration: Set speed19Switch> Port Configuration: Set flow control19Switch> Statistics Page19Switch> Statistics> Refresh20Switch> Statistics> Clear Counter20Switch> VLAN Page20Switch> VLAN> Port-based VLAN21Change members21Add VLAN21Delete VLAN21Switch> VLAN> IEEE802.1Q Tag VLAN21Add a port to a VLAN Group22Remove a port from a VLAN Group22Create a new VLAN Group22Delete a VLAN Group22PVID Setting23Switch> Trunking Page23Switch> Monitor Page24Switch> Advanced> Jumbo Frame24Switch> Advanced> Spanning Tree Page25Switch> Advanced> SNMP25Firmware Menu26Firmware> Configuration Backup Page26Firmware> Factory Reset Page26Logout27Chapter 5 Software Upgrade29Appendix A Default Settings31Appendix B IEEE 802.1Q Virtual Local Area Network (VLAN)33IEEE 802.1Q VLANs34Appendix C Port-Based VLAN37Port-based VLANs37Example37Scenarios:38Appendix D Cabling Guidelines39Fast Ethernet Cable Guidelines39Category 5 Cable40Category 5 Cable Specifications40Twisted Pair Cables41Patch Panels and Cables42Using 1000BASE-T Gigabit Ethernet over Category 5 Cable43Cabling43Near End Cross Talk (NEXT)44Patch Cables44RJ-45 Plug and RJ-45 Connectors44Conclusion46크기: 515킬로바이트페이지: 46Language: English매뉴얼 열기
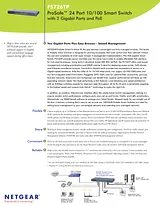
하드웨어 매뉴얼차례OVERVIEW6FEATURES7PACKAGE CONTENTS8FRONT AND BACK PANELS910/100 MBPS RJ-45 PORTS9POE PORTS9LED DESCRIPTIONS10RESET BUTTON11FACTORY DEFAULTS BUTTON11STEP 1: PREPARING THE SITE12STEP 2: INSTALLING THE SWITCH12STEP 3: CHECKING THE INSTALLATION13STEP 4: CONNECTING DEVICES TO THE SWITCH13STEP 5: INSTALLING AN SFP GBIC MODULE13STEP 6: APPLYING AC POWER14STEP 7: SWITCH MANAGEMENT THROUGH A WEB BROWSER OR THE PC UTILITY FOR INITIAL CONFIGURATION14TROUBLESHOOTING CHART17ADDITIONAL TROUBLESHOOTING SUGGESTIONS17Figure 1-1. Package Contents8Figure 2-1. Front Panel of the NETGEAR ProSafe FS726TP Smart Switch with PoE9Figure 2-2. Back Panel of the NETGEAR ProSafe FS726TP Smart Switch with PoE9Figure 3-1. Example of Desktop Switching12Figure 4-1. Attaching Mounting Brackets13Figure 4-2. Connecting Devices to the Switch13Figure 4-3. Installing a Gigabit Ethernet Module into FS726TP14Table 2-1. Front Panel LEDs:10Table 4-1. Site Requirements12Table B-1. Troubleshooting Chart17크기: 325킬로바이트페이지: 19Language: English매뉴얼 열기