Информационное РуководствоСодержаниеImportant Safety and Product Information2Informations importantes relatives au produit et à la sécurité6Informazioni importanti sulla sicurezza e sul prodotto9Wichtige Sicherheits- und Produktinformationen13Información importante sobre el producto y tu seguridad17Informações importantes de segurança e do produto20Belangrijke veiligheids- en productinformatie23Vigtige produkt- og sikkerhedsinformationer27Tärkeitä turvallisuus- ja tuotetietoja30Viktig sikkerhets- og produktinformasjon32Viktig säkerhets- och produktinformation35Ważne informacje dotyczące bezpieczeństwa i produktu39Размер: 347,1 КБСтраницы: 44Языки: English, Français, Italiano, Português, Język polskiПросмотреть
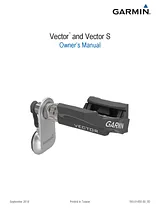
Инструкции ПользователяСодержаниеTable of Contents3Introduction5Thank You5Getting Started5Tools Needed5Installing the Vector Components5Preparing the Crank Arms5Determining Pedal Pod Clearance5Determining the Bicycle Chain Clearance5Installing the Pedal Pod and Pedal5Installing the Left Pedal and Pedal Pod6Installing the Right Pedal6Installing the Shoe Cleats6Adjusting the Release Tension6Paring Vector with Your Edge 10006Your First Ride7Entering the Crank Length7Setting the Installation Angle7Performing a Static Zero Calibration7Calibrating Vector Before Each Ride7Customizing the Data Fields7Training7Pedal-Based Power7Maintenance Tips7Vector Data7Sending Your Ride to Garmin Connect7Garmin Connect7Disconnecting the USB Cable8Device Information8Vector Device Care8Removing the Pedal Pod and Pedal8Replacing the Pedals and Cartridges8Vector Storage9Vector Specifications9USB ANT Stick™ Specifications9Battery Information9Replacing the Pedal Pod Battery9Appendix9Registering Vector9Edge 810 and 510 Device Instructions9Pairing Vector with Your Edge 810 or 510 Device9Entering the Crank Length10Performing a Static Zero Calibration10Edge 800 Device Instructions10Pairing Vector with the Edge 800 Device10Calibrating Vector with the Edge 800 Device10Entering the Crank Length10Performing a Static Zero Calibration10Edge 500 Device Instructions10Pairing Vector with the Edge 500 Device10Calibrating Vector with the Edge 500 Device10Entering the Crank Length10Performing a Static Zero Calibration10Customizing the Data Fields10Power Data Fields10Troubleshooting11Updating the Software Using Vector Updater11Tips for Using Vector Updater11Performing a Static Torque Test11Upgrading Vector S to a Dual Sensor System11Third-Party Devices11Index12Размер: 3,0 МБСтраницы: 14Язык: EnglishПросмотреть
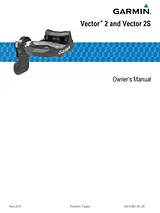
Инструкции ПользователяСодержаниеTable of Contents3Introduction5Thank You5Getting Started5Tools Included5Tools Needed5Installing the Vector Components5Preparing for the Installation5Determining the Bicycle Chain Clearance5Installing the Pedal and Pedal Pod5Installing the Left Pedal and Pedal Pod6Installing the Right Pedal6Installing the Shoe Cleats6Adjusting the Release Tension6Paring Vector with Your Edge 10006Pedal Pod Status LED6Your First Ride6Entering the Crank Length6Setting the Installation Angle7Customizing the Data Fields7Training7Pedal-Based Power7Cycling Dynamics7Using Cycling Dynamics7Power Phase Data7Platform Center Offset7Maintenance Tips7Vector Data7Sending Your Ride to Garmin Connect7Garmin Connect8Disconnecting the USB Cable8Device Information8Vector Device Care8Removing the Pedal Pods and Pedals8Replacing the Pedals and Cartridges8Vector Storage9Vector Specifications9USB ANT Stick™ Specifications9Battery Information9Replacing the Pedal Pod Battery9Other Compatible Devices10Edge 810 and 510 Device Instructions10Pairing Vector with Your Edge 810 or 510 Device10Entering the Crank Length10Edge 800 Device Instructions10Pairing Vector with the Edge 800 Device10Entering the Crank Length10Edge 500 Device Instructions10Pairing Vector with the Edge 500 Device10Entering the Crank Length10Customizing the Data Fields10fēnix® 3 Device Instructions10Pairing Vector with the fēnix 3 Device10Customizing the Data Fields10Entering the Crank Length10fēnix 2 Device Instructions10Pairing Vector with the fēnix 2 Device10Customizing the Data Fields11Entering the Crank Length11Forerunner® 920XT Device Instructions11Pairing Vector with the Forerunner 920XT Device11Customizing the Data Fields11Entering the Crank Length11Forerunner 910XT Device Instructions11Pairing Vector with the Forerunner 910XT Device11Customizing the Data Fields11Entering the Crank Length11Appendix11Registering Vector11Power Data Fields11Troubleshooting12Updating the Software Using Vector Updater12Tips for Using Vector Updater12Updating the Vector Software Using the Edge 100012Understanding the Multiple Status LED Flashes12Performing a Static Torque Test13Crank Compatibility13Third-Party Devices13Index14Размер: 2,4 МБСтраницы: 16Язык: EnglishПросмотреть
Краткое Руководство По УстановкеСодержаниеVector Quick Start Manual2Tools Needed2Installing Vector Components2Preparing the Crank Arms2Determining Pedal Pod Clearance2Installing the Pedal Pod and Pedal2Installing the Shoe Cleats2Adjusting the Release Tension3Paring Vector with Your Edge® 10003Your First Ride3Entering the Crank Length3Setting the Installation Angle3Performing a Static Zero Calibration3Calibrating Vector Before Each Ride3Troubleshooting3Getting the Owner's Manual3Vector Storage3Manuel de démarrage rapide du Vector4Outils requis4Installation des composants du Vector4Préparation des manivelles4Détermination du dégagement du boîtier de pédale4Installation des boîtiers de pédale et des pédales4Installation des cales de chaussure4Réglage de la tension de déchaussage5Couplage du Vector avec votre Edge 10005Votre premier parcours5Saisie de la longueur du pédalier5Réglage de l'angle d'installation5Etalonnage du point zéro5Etalonnage du Vector avant chaque parcours5Dépannage5Téléchargement du manuel d'utilisation5Stockage du Vector5Manuale di avvio rapido di Vector6Strumenti necessari per l'installazione6Installazione dei componenti di Vector6Preparazione delle pedivelle6Come determinare l'ingombro del pedal pod6Installazione del pedal pod e del pedale6Installazione delle tacchette sulle scarpe6Regolazione del rilascio della tensione7Associazione di Vector al Edge 10007La prima corsa in bici7Inserimento della lunghezza della pedivella7Impostazione dell'angolo di installazione7Esecuzione di una calibrazione statica con riferimento allo zero7Calibrazione del sistema Vector prima di ogni corsa in bici7Risoluzione dei problemi7Manuale Utente7Conservazione del Vector7Vector – Schnellstartanleitung8Erforderliches Werkzeug8Montieren der Vector Komponenten8Vorbereiten der Tretkurbeln8Ermitteln des Freiraums der Pedalsender8Montieren des Pedalsenders und der Pedale8Montieren der Schuhplatten8Anpassen der Auslösehärte9Koppeln des Vector mit dem Edge 10009Ihre erste Tour9Eingeben der Kurbellänge9Einrichten des Montagewinkels9Durchführen einer statischen Nullkalibrierung9Kalibrieren des Vector vor jeder Tour9Fehlerbehebung9Benutzerhandbuch9Aufbewahrung des Vector9Guía de inicio rápido de Vector10Herramientas necesarias10Instalación de los componentes de Vector10Preparación de las bielas10Determinación del espacio para el sensor de potencia10Instalación del sensor de potencia y el pedal10Colocación de las calas de las zapatillas10Ajuste de la tensión de liberación11Vinculación de Vector con la unidad Edge 100011Primer recorrido11Introducción de la longitud de la biela11Configuración del ángulo de instalación11Realización de una calibración estática a cero11Calibración de Vector antes de cada recorrido11Solución de problemas11Obtención del manual del usuario11Almacenamiento de Vector11Manual de início rápido do Vector12Ferramentas necessárias12Instalar os componentes do Vector12Preparar os braços da manivela12Determinar o espaçamento do pedal pod12Instalar o Pedal pod e o pedal12Instalar os calços para os sapatos12Ajustar a tensão de libertação13Emparelhar o Vector com o seu Edge 100013A sua primeira viagem13Introduzir o comprimento da manivela13Definir o ângulo de instalação13Realizar a calibração de zero estática13Calibrar o Vector antes de cada viagem13Resolução de problemas13Obter o manual do utilizador13Armazenar o Vector13Vector snelstartgids14Benodigd gereedschap14Vector onderdelen installeren14De pedaalarmen voorbereiden14De afstand tot de pedaalsensor bepalen14De pedaalsensor en het pedaal installeren14De schoenplaatjes installeren14De vrijmaakspanning instellen15Vector koppelen met uw Edge 100015Uw eerste rit15De pedaallengte invoeren15De installatiehoek instellen15Een vaste nulreferentie instellen15De Vector kalibreren voor elke rit15Problemen oplossen15De gebruikershandleiding downloaden15Opslag van de Vector15Vector Lynstartvejledning16Nødvendigt værktøj16Installering af Vector komponenter16Klargøring af pedalarmene16Bestemmelse af afstand til pedalsensoren16Installation af pedalsensoren og pedalen16Installation af skoklamper16Justering af udløserspændingen17Parring af Vector med din Edge 100017Din første tur17Indtastning af pedallængden17Angivelse af installationsvinklen17Udførelse af en statisk nulkalibrering17Kalibrering af Vector før hver tur17Fejlfinding17Sådan henter du brugervejledningen17Opbevaring af Vector17Vector aloitusopas18Tarvittavat työkalut18Vector osien asentaminen18Poljinkampien valmistelu18Poljinanturin liikkumisvaran määrittäminen18Poljinanturin ja polkimen asennus18Kengän kiinnikkeiden asentaminen18Kiristysruuvin säätäminen19Vectorin pariliittäminen Edge 1000 laitteen kanssa19Ensimmäinen ajokerta19Kammen pituuden määrittäminen19Asennuskulman määrittäminen19Staattisen nollakohdan kalibrointi19Vector laitteen kalibrointi ennen joka ajokertaa19Vianmääritys19Käyttöoppaan hakeminen19Vectorin säilytys19Hurtigstartveiledning for Vector20Nødvendige verktøy20Installere Vector komponentene20Forberede krankarmene20Fastslå klarering for pedalsensoren20Installere pedalsensoren og pedalen20Installere skoklossene20Justere utløserstrekk21Parkoble Vector med Edge 100021Den første sykkelturen21Angi kranklengden21Angi installeringsvinkelen21Utføre statisk null-kalibrering21Kalibrere Vector før hver tur21Feilsøking21Få tak i brukerveiledningen21Oppbevare Vector-enheten21Vector Snabbstartshandbok22Verktyg som behövs22Installera Vector komponenter22Förbereda vevarmarna22Bestämma spelet för pedalenheten22Installera pedalenheten och pedalen22Installera skoklossar22Justera spänningen23Para ihop Vector med din Edge 100023Din första cykeltur23Ange tramplängden23Ställa in installationsvinkeln23Utföra en statisk nollkalibrering23Kalibrera Vector före varje tur23Felsökning23Hämta användarhandboken23Förvara Vector23Skrócony podręcznik użytkownika Vector24Niezbędne narzędzia24Montaż komponentów urządzenia Vector24Przygotowanie ramion korby24Określanie odstępu od czujnika na pedał24Montaż czujnika na pedał i pedału24Montaż bloków do pedałów24Regulacja naprężenia wypinania25Parowanie czujnika Vector z urządzeniem Edge 100025Pierwsza jazda25Wprowadzanie długości korby25Ustawianie kąta montażu25Kalibrowanie statycznego punktu zerowego25Kalibrowanie urządzenia Vector przed każdą jazdą25Rozwiązywanie problemów25Pobieranie podręcznika użytkownika25Przechowywanie urządzenia Vector25Размер: 2,2 МБСтраницы: 26Язык: EnglishПросмотреть
Декларация СоответствияРазмер: 121,3 КБСтраницы: 6Языки: English, Français, Italiano, Deutsch, Español, PortuguêsПросмотреть