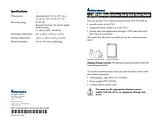
User GuideTable of ContentsBefore You Begin11Safety Information11Global Services and Support11Warranty Information11Web Support12Telephone Support12Who Should Read This Manual13Related Documents13Downloading or Ordering Intermec Documents13Understanding the Difference Between CN2 and CN2A13About the CD Attached to the Front Cover14Patent Information14Other Copyright Information14Chapter 1 - Using the CN2A Mobile Computer17Introducing the CN2A Mobile Computer18What’s New?18CN2A Features, Applications, and Accessories19Identifying the Optional Features Installed in Your CN2A20Using the Battery21Installing and Charging the Battery22Removing the Battery23Maximizing Battery Life25Checking the Battery Status25Using the Keypad25Using the Numeric Keypad25Using the Scroll Keypad27Using the Power Key28Using the Touch Screen29Using the Touch Screen and Stylus29Understanding the Desktop30Using Transcriber to Write on the Touch Screen30Calibrating the Screen31Understanding the Screen Icons31Understanding the Status Lights33Understanding the Beeps34Running Multiple Applications on the CN2A35Using Task Manager to Manage Multiple Active Tasks35Using the Active Applications List To Manage Multiple Active Tasks37Scanning Bar Codes38How to Scan a Bar Code38Using the ScanDemo Application39Increasing File Storage With the Optional SD Card41Attaching a Keyboard to the CN2A44Chapter 2 - Configuring the CN2A47How to Configure the CN2A Parameters48Configuring the CN2A With the Setup Assistant49Configuring the CN2A Locally With Intermec Settings50Learning About the Configuration Commands in Intermec Settings50Opening Intermec Settings50Navigating Through Intermec Settings51Saving Your Settings53Exiting Intermec Settings53Restoring the CN2A Default Settings53Configuring the CN2A With SmartSystems Console54Installing an Asian Font55Customizing the CN2A Keypad55Using the Control Panel to Customize the Keypad56Using a Registry Editing Program to Customize the Keypad57Writing an Application to Customize the Keypad58Chapter 3 - Adding the CN2A to the Network59Configuring the CN2A For Your Network60Configuring USB Communications60Configuring 802.11b/g Radio Communications61Configuring the Network Parameters for a TCP/IP Network62Configuring the Network Parameters for a UDP Plus Network64Configuring Network Security65Choosing Between Funk Security and Microsoft Security Software66Selecting and Defining Profiles for Funk Security66Choosing Microsoft Security Software67Using WPA Security68Configuring WPA Security With Funk Security69Configuring WPA Security With Microsoft Security71Using 802.1x Security74Configuring 802.1x Security With Funk Security74Configuring 802.1x Security With Microsoft Security76Using LEAP Security78Using Static WEP Security79Configuring Static WEP Security With Funk Security79Configuring Static WEP Security With Microsoft Security80Loading Certificates81Disabling Security83Viewing Wireless Network Information84Using Remote Desktop Connection85Transferring Files With FTP88Enabling the FTP Server on the CN2A88Changing the Default FTP User Name and Password89Updating Your Access Control List90Using FTP to Transfer Files90Using the Modem Dock for Internet Access and E-mail91Connecting to the Internet Through the Modem Dock91Setting Up an E-mail Account Through the Modem Dock98Chapter 4 - Developing and Installing Applications101Developing Applications for the CN2A102Developing a New Application102Understanding the Resource Kits and Platform SDKs102Downloading the Resource Kits and CN2A Platform SDK103Understanding the Hardware and Software Requirements103Developing a Web-Based Application104Installing Applications on the CN2A104Installing Applications Using ActiveSync105Installing ActiveSync and Establishing a Partnership106Using ActiveSync to Copy Files and Install Applications107Installing Applications Using the Optional SD Card108Installing Applications Using the SmartSystems Console109Installing Applications Using Wavelink Avalanche109Setting Up Applications to Persist Through a Cold Boot110Launching Your Application Automatically111Chapter 5 - Troubleshooting and Maintaining the CN2A113Problems and Solutions114Running Diagnostics123Contacting Intermec Product Support126Before Calling Product Support126Sending the CN2A to Intermec for Service126Booting the CN2A127Warm Booting the CN2A127Cold Booting the CN2A128Upgrading the CN2A129Downloading the Upgrade .exe File to Your PC130Using the SmartSystems Console to Upgrade the CN2A131Using an SD Card to Upgrade the CN2A134Cleaning the Scanner Window and the Touch Screen141Appendix A - Specifications and Accessories143Physical and Environmental Specifications144Accessories for the CN2A146Appendix B - Default Configuration149Default Configuration150Appendix C - Remapping the CN2A Keypad153Remapping the CN2A Keypad154Choosing How to Change Keypad Registry Settings154Locating the Registry Settings for Your Keypad154Identifying the Registry Entry for Each Physical Key155Understanding Keypad Attributes156Creating Multiple Key Definitions157Specifying a Key Sequence to Launch an Application158Sample Registry Settings159Numeric Keypad Registry Settings159Scroll Keypad Registry Settings160Restoring the Default Registry Settings160Numbers162A162B162C163D164E165F165G165H166I166J, K166L167M167N167O168P168R168S169T170U171V172W172X, Y, Z172Index161Numbers162A162B162C163D164E165F165G165H166I166J, K166L167M167N167O168P168R168S169T170U171V172W172X, Y, Z172Size: 5.77 MBPages: 174Language: EnglishOpen manual
Quick Setup GuideSize: 2.26 MBPages: 40Languages: English, Français, Deutsch, Português, EspañolOpen manual